Requirements
1. Install aTV Flash
2. Run the Smart Installer to complete installation.
3. Download the NFS Enabler [Download Link]
Enable NFS and Select Which Files to Share
1. Unzip the NFS-Enabler.zip file downloaded in step 1 above.
2. Double-click the NFS.prefPane item to install it.
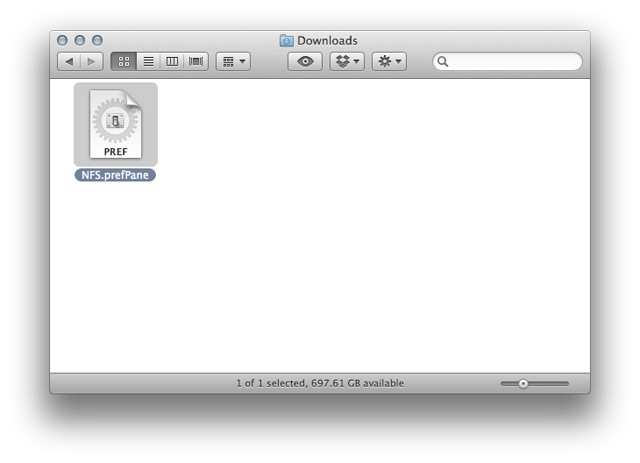
3. Once installed, a new NFS item will be visible in the System Preferences menu.
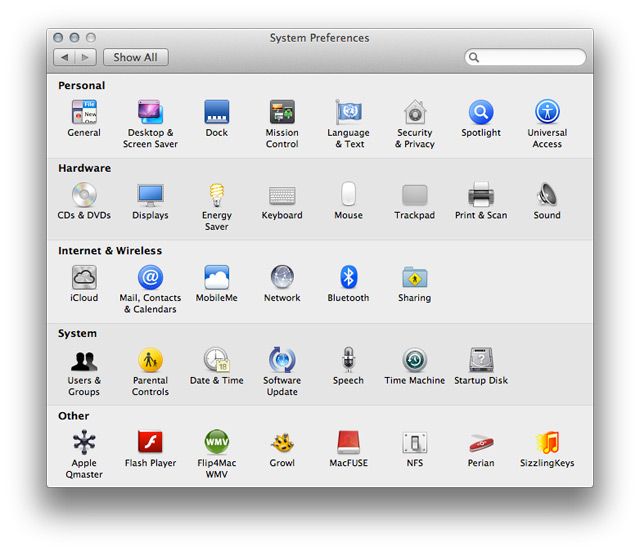
4. Click the new NFS item to open the NFS setup window.
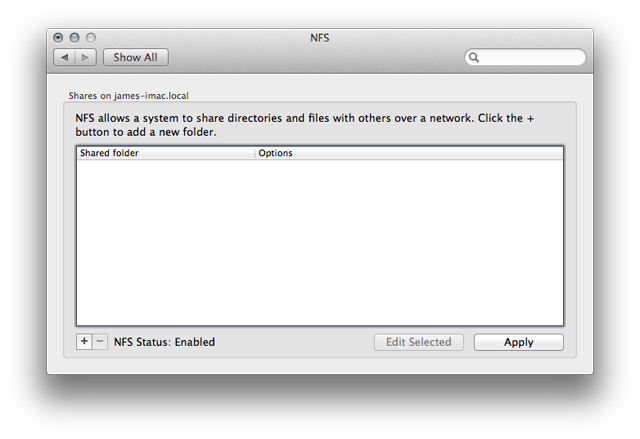
5. Press the + button to add folders or drives to the list, or just drag them into the Shared Folder window (don't worry about the items listed under the Options heading).
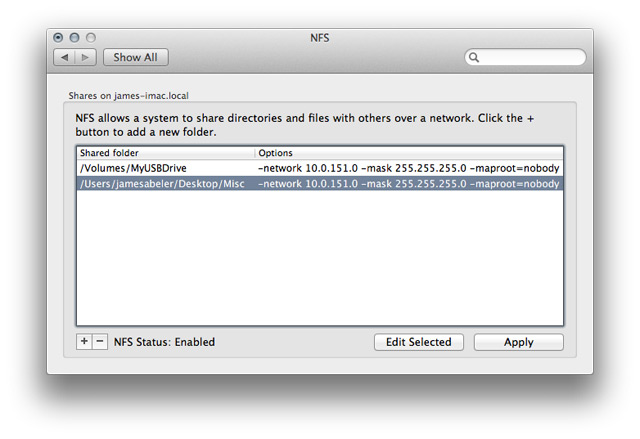
6. Once all the desired items have been added click the Apply button to save your changes.
Setup a Share on the ATV1
1. Navigate to the nitoTV --> Network menu and select the Mac you wish to stream from.
2. Select the option to Create a Manual Share Point.
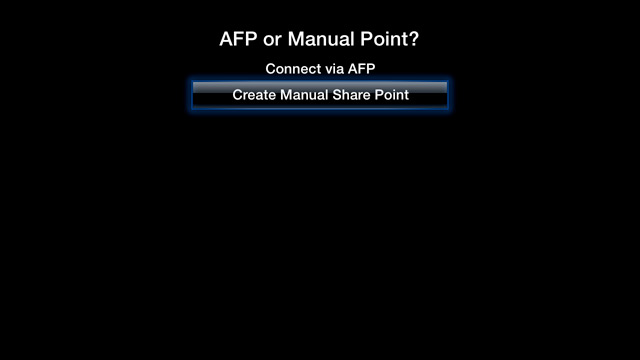
3. A setting screen will appear where the share info can be entered.
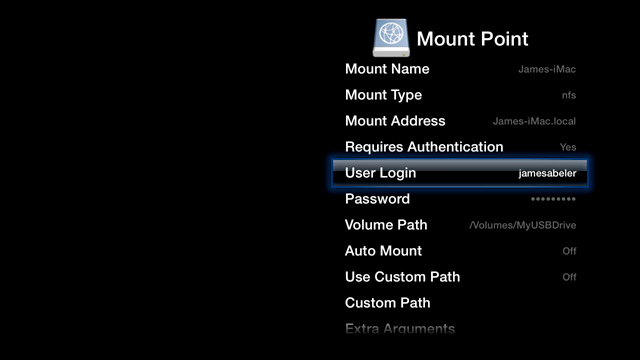
Settings Details
Mount Name: This is only how the mount point will be displayed in the AppleTV menu and has no functional importance.
E.G. My Shared Media
Mount Type: This is the protocol used for streaming media over the network. Set this to NFS when streaming from Mac OS X 10.7 (Lion).
Network Address: This address can be in the form of an IP address or a DNS name. If you are streaming from a Mac or PC your computer name will work, so iBook G4 would be iBook-G4.local the computer name for the Mac is viewable in System Preferences > Sharing. No afp:// or // is necessary, for each different protocol nitoTV will accommodate the proper formatting.
E.G. My-iMac.local or 10.0.0.6
Requires Authentication: Yes = Registered User, No = Guest (Registered User recommended).
User name: The user name for the system/device you wish to connect to.
E.G. John Smith or johnsmith
Password: The password for the system/device you wish to connect to. (Note: Even if you have logins performed upon startup automatically this does NOT mean you don't have a password, just think of the password you use for authenticating installations)
E.G. password123
Volume path: This is the path to the folder folder/drive you wish to mount. For NFS shares this should match how the Shared Folder appears in the NFS menu.
E.G. /Volumes/MyUSBDrive or /Users/jamesabeler/Desktop/Misc
Auto Mount: This feature will mount the share automatically when the AppleTV starts up. (Note: mounts have a 15 second delay upon startup, the moment startup occurs networking isn't immediately available so there is a delay before attempting to make network connections).
Use Custom Path: This will toggle on or off a custom path to be linked into your mount location. (This option is not typically used)
Custom Path: This option is used to add an extra link to a folder within the folder/drive that was already entered as the Volume Path. This is only used if the above option (Use Custom Path) is toggled on. The path chosen here will be appended to the Volume Path and will be linked into your mount location. (This option is not typically used)
E.G. DVDs/Comedy
Make sure select 'Save Mount Point' after completing the setup. The network mount will now appear under the nitoTV --> Network menu. If 'Auto Mount' is enabled, the mount will automatically appear in the Files listing when the Apple TV starts up.